Brew tea at work or on the road traditional way quite problematic. A completely different thing is a tea bag. What is it like to brew tea with it? I dropped the bag into a cup or plastic cup, and you're done. Tasty drink you can try. And you don’t even need to wash the cup for a long time after drinking tea. It is enough to throw the used bag in the trash can.
Tea bag - what is it? Origin story
It is a small bag made from which tea is located. This is the easiest way to quickly brew tea.
They were invented in 1904 by the American tea and coffee merchant Thomas Sullivan. To send samples of the goods to his clients, he packaged tea in silk bags and tied them with braid. One of the merchant's potential customers decided to immediately taste the drink and brewed tea without opening the bag. It was a real success.
Tea bags quickly began to spread throughout Europe and America. Until 1929 they were made and sewn by hand. Then tea began to be packaged in filter paper. In 1950, an engineer from the German company Teekanne invented the double rectangular tea bag. What was he? It was a real modern bag with a string fixed with a metal clip and a paper label.
Mass production of tea began under the leadership of the owner of the tea factory, Thomas Lipton, who decided to pack tea in cardboard boxes instead of cans. This method of packaging tea bags made of filter paper is still used today.
For all lovers of tea bags, it will be interesting to know a few facts about this product. Tea bag... What is interesting known about it?

- The most expensive tea bag costs £7,500,000. Inside and outside it is encrusted with diamonds, and the highest quality and most expensive leaf tea is used as brewing.
Most often, instead of loose tea bags, they are filled with tea dust. This is the waste that remains after roasting the leaves. Unscrupulous sellers, in order to increase the volume of tea leaves, add dried wastes of other plants to tea dust.
In the UK, brew bags are round, allowing the brew bag to fit directly into the bottom of the cup.
The share of tea bags is growing every year. Today, he owns almost 80 percent of the world and European tea market, and only in the UK this figure has reached 90%.
Can tea bags be brewed multiple times?
For thrifty people, the tea bag is a poor alternative to leaf brewing. The cost of a paper bag, even according to the most conservative estimates, is at least 2 times higher. But many enterprising people have found a way to save money by brewing tea in a bag several times.

However, doctors warn that doing this is strictly not recommended. It has been proven that repeated brewing of tea bags releases toxins that are harmful and even dangerous to the body.
How to use used sachets
After a single use, the tea bag is usually thrown away. But some people have found a use for it here, too. A used tea bag, in their opinion, can be:
- therapeutic tampon with tea to relieve fatigue from the eyes;
- dishwashing detergent;
- fertilizer for indoor plants;
- disposable pot for growing seedlings.
The scope of sachets is not limited to this, just as human imagination does not dry out.
sachet yourself
The most ordinary tea bag can be a unique creative gift for loved ones. To do this, you just need to do it yourself. You can use one of the suggested methods.

- To make a tea bag, you can use paper ones. From them, bags of arbitrary shape and size are cut out, which are sewn on three sides manually or on a sewing machine. After that, the tea leaves are poured, and the bag is sewn up from the fourth side. Optionally, you can attach a thread for brewing with a label.
- A do-it-yourself tea bag can be made from a thin translucent fabric, such as organza. A round base is cut out of the fabric, in the center of which tea is poured (about a teaspoon). Then the fabric is gathered in a circle and firmly fixed on top with a thread. For reliability, the junction can be sewn up.
- On some sites for sale there are special blanks for tea bags. It is enough to fill them with tea leaves, fix on the last side and decorate as desired. An original and very pleasant gift is ready. Happy tea!
Due to its ease of use, tea bags have long gained popularity and even somewhat supplanted the loose counterpart. Indeed, throwing a triangle with tea leaves into boiling water is much easier than cooking invigorating drink by all rules. But the quality of such tea often leaves much to be desired. Unfortunately, some manufacturers use the peculiarities of the packaging, filling bags with tea leaves of dubious quality. Needless to say, true connoisseurs always choose brewing tea leaf by buying only loose product.
If you are not ready to give up convenience, but at the same time want to drink quality and delicious drink try making your own tea bags. This approach guarantees you excellent results with a minimum of time and effort. In addition, you can independently vary the composition of the tea leaves by adding various ingredients to it to your liking. So you will become a real creator of your own tea bouquet, which will give you the opportunity to enjoy the bright aroma and rich color of your favorite drink, which will fully meet your personal preferences.
So, for the preparation of tea bags, we need:
- 1 cup loose leaf tea
- lemon or orange peels (optional)
- various spices and dried herbs (optional)
- deep bowl,
- paper filters for coffee makers
- scissors,
- stapler,
- thick cotton thread
- paper and pen.
Cooking.
1.
Use your favorite variety as the basis for your bouquet loose tea, the quality of which suits you. If you are aiming for a unique combination, use several different varieties. Also, if desired, you can combine into one bouquet, for example, black and green tea. It all depends on your personal preferences and creative fuse.
2.
Pour the tea leaves into the bowl and add additional components to it. Pairs well with black and green tea lemon and orange peel. Grate citrus peel on a fine grater and add about a teaspoon to the main composition. To give the drink an invigorating aroma, you can use fresh or dried mint. If you're aiming for a deeper flavor with spicy notes, add some cinnamon or cloves to your tea leaves. You can also supplement the composition with dried linden, rose hips or chamomile to make it more useful and rich.
In short, you can use the spices and herbs you like, or, on the contrary, give up any additives in favor of traditional tea without additional flavors.

3.
Now let's start making tea bags. The basis will be paper filters for coffee makers, which can be easily found in household appliances and accessories stores.
Fold the filter in half and cut it with scissors. The resulting triangles are too big for our purpose, so the bottom part should be shortened a bit.

4. Pour a teaspoon of tea leaves into the triangle and carefully wrap the open parts so that the bag is closed on all sides.

5. Cut 10 centimeters of thick thread and fasten it in the upper corner of the triangle by tucking the corner and fixing it with a stapler.

6. To make the bags look presentable and elegant, decorate them with labels cut out of thick colored paper. Sign the impromptu label with a marker, indicating the name of your unique tea blend.

Put the finished bags in a suitable container so that you can always enjoy homemade tea with your family or take them with you on a trip. If desired, you can pack them in a beautiful box or cloth bag and use as a gift. If among your friends there are true connoisseurs fragrant drink, they will surely appreciate such a hand-made token of attention.
Tea is always a great gift for a variety of occasions. But what if you arrange it in such a way that you can’t find it in any store? We bring to your attention a unique master class that will help you make a tea bag with your own hands. It will not take too much time, and the gift will turn out to be very original, and in a single copy. Even such an ordinary activity as drinking tea can be turned into a small holiday. To do this, you can make a tea bag and decorate it with cute little hearts.

Required materials and tools:
- coffee filters;
- scissors;
- sewing machine;
- stapler;
- embroidery threads;
- paper (thick paper, old book or newspaper pages);
- spices (cinnamon, ground ginger, mint).
Cut out rectangles
Cut out two rectangles from coffee filters, just cut off the ribbed part.

We sew the sides
Sew the filters on three sides, leaving one of the smaller sides open.

Filling the bag
Fill the bag with tea. It usually takes about 1-2 teaspoons, depending on the size of the bag and how strong you like the tea, you can also add 1/2 teaspoon of your favorite spices.

Sew up the bag
Now completely sew up your bag with a thread and a needle with small stitches. Fold the corners towards the center of the bag. Then fold the resulting tip to the center, attach a long thread to this place and secure with a stapler. If you want, then this place can be stitched with threads.


Attaching hearts
Cut out a few hearts from the prepared paper and attach them to the end of the thread with glue or with a stapler. Brew this tea bag in your favorite cup, let steep for 3-5 minutes and enjoy.
What could be tastier than tea? And only tea packed in such a creative bag with cute hearts can be even tastier. Finding such a thing on sale is unrealistic, but we managed to make a tea bag with our own hands.
Sometimes my hands itch to "reinvent the wheel". Do not get into the Internet and take advantage of the ready-made fruits of human thought, but disassemble / understand it yourself, with your own hands ...
This is what happened with paper bags. After all, there are schemes on the net! But no, she picked up the paper and began to twirl, remembering how it looked when "from the store", and how it can be done! Moreover, you can do it "by eye", without a ruler and marking the sheet - just fold it neatly so that the edges of the paper are parallel to each other.
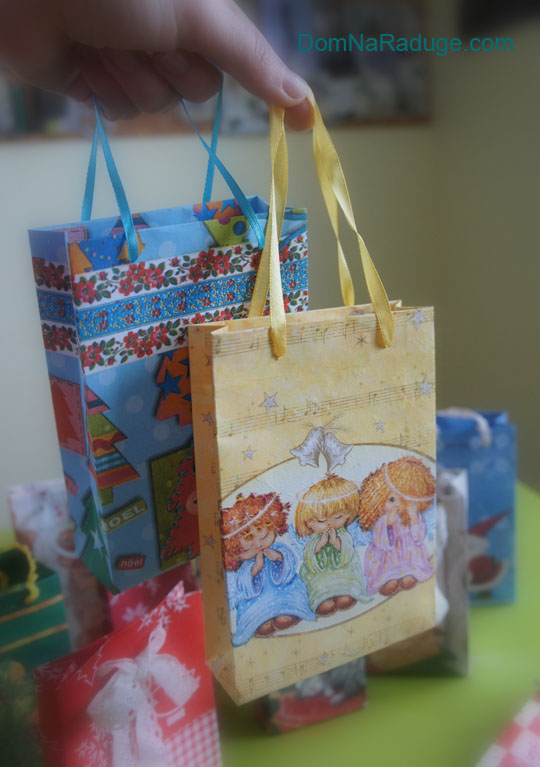
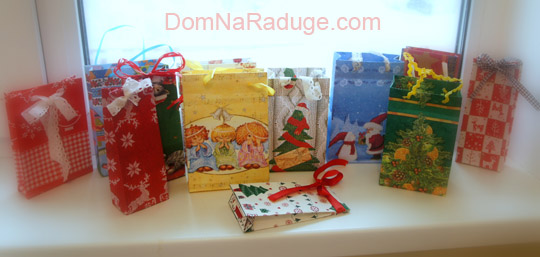
I made these New Year's bags from "designer paper" made using the hot decoupage method (I will give the "recipe" in the next post):
.jpg)
So, a master class on paper bags is for those who are interested in making not only gifts, but also packaging with their own hands.
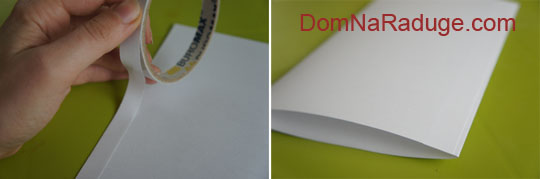
1. We take a sheet of paper. I took the usual, white, A4 format. We also need narrow double-sided tape or glue.
We wrap the edge of the sheet, slightly wider than the tape strip. We wrap the other edge towards it so that it slightly overlaps the first fold (about 1-2 mm)

2. We glue the edge with double-sided tape. You can also glue, but make sure that it does not flow over the edges and wait until it dries.
3. Decide how thick your package will be - we determine by eye. And carefully bend our paper "pipe", keeping the edges parallel. So we get even edges of our "parallelepiped".

4. We make a fold inward on the sides of the package. Align the edge to the edge so that it is parallel.
.jpg)
5. Now we make the bottom of the package. We look at the side part and from below we measure a distance approximately equal to the width of the sidewall. We bend the bottom of the package, first in one direction, then in the opposite direction.
.jpg)
6. We make the bottom like an envelope - as if we were packing a box in paper: we wrap the corners inward at 45 0.
We glue the "ears" with double-sided tape or ordinary glue.
.jpg)
7. To make the top of the paper bag look neater, fold the edge inward. In addition, if we want to make a bag with handles, then this will be stronger.
We make pens from tape - with a needle or through holes (if there is a hole punch).
.jpg)
Homemade paper bags are also good because you can not make ordinary pens, but show your imagination - for example, stretch a ribbon through one or two pairs of holes and tie a bow:
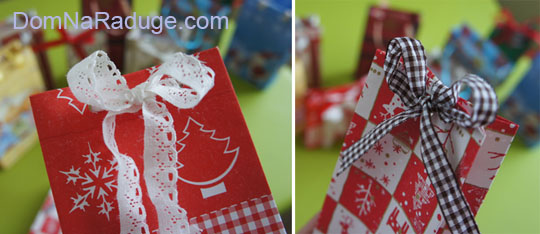
Or, wrapping the top of the bag a couple of times, fasten it with tape (in a similar way, loose tea is often packed, only there is a flexible strip with wire instead of a tape).

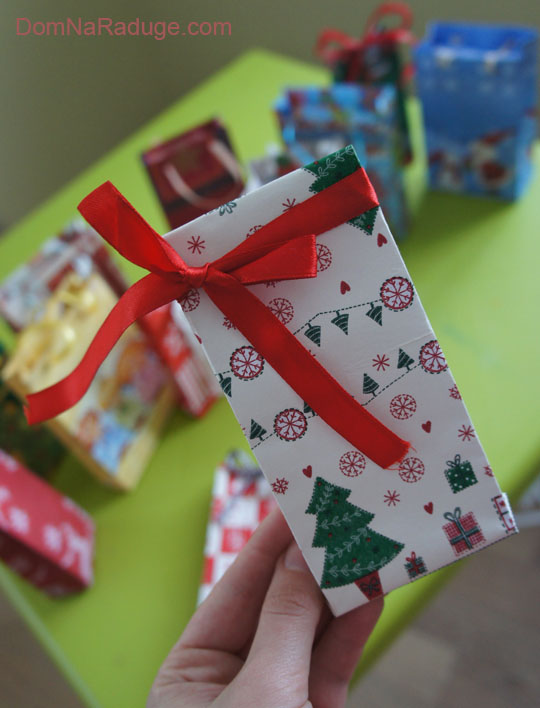
For herbal tea I made these bags from colored office paper. Kraft bags look good (combined with red ribbons or white lace). You can make packages from magazines or last year's calendars ... And my friend makes them from ebru paper:.
Happy pre-holiday chores!
Oksana Shapkarina
We make tea bags.Something, but you won’t find out how to make a tea bag everywhere! When buying tea in bags, we do not know what its quality is. You never know what they grinded there. But you can find a way out. For example, buy special bags for brewing tea in the store or make them yourself .... :)
And so, we look ......
You will need filter paper, thread, plain paper and delicious tea. Did you know that tea bags used to be made of silk. But it was too expensive. Then they began to use gauze for this, and then in 1929 filter paper. It has unique properties: it has high water resistance and low density.
Tea bags come in different shapes. The British love round ones, which lie at the bottom of the mug and saturate the tea with taste in stages. There are pyramidal packages, but we will make a two-chamber package.
Follow photo instructions.
For one bag, you will need a piece of filter paper twice the length of the bag and twice the width.
Draw fold lines as shown in the photo.
Bend along the lines, fold the bag as shown in the photo.
Put tea into the bag to taste.
It remains to fasten. It can be a stapler, it can be a thread. Most importantly, no glue.
Now let's print out, cut out the tags for the bags, on which you can write the name of the tea variety. Bend along the dotted line, insert the thread from the bag inside and glue the two sides of the tag together.
You can also use this option:
These homemade bags are very cute and will be wonderful and original gift! Here's how you can make them...
- filters for coffee;
- scissors;
- a sewing machine (in extreme cases, you can get by with a needle and thread);
- stapler;
- floss for embroidery;
- paper for the tag;
- cinnamon, ground ginger, mint, thyme and other herbs (optional).
Step 1: Cut out rectangles from two coffee filters. You can just cut off the ribbed part.
Step 2: Sew the filters on three sides, leaving one of the smallest sides open.
Step 3: Fill the bag with brewed tea. I use 1-2 teaspoons, depending on the size of the bag and how strong you like the tea. (You can also add half a teaspoon of herbs.)
Step 4: Sew the unsealed part of the tea bag. Now it should be stitched on 4 sides!
Step 5: Bend the corners as shown in the photo. Under one corner, hide the end of the floss for embroidery 5-6 centimeters long.
Step 6: Bend the top tip down and secure with a stapler (you can also sew this part if you want).
Step 7: Cut out paper tags and glue, sew, "staple" them to the end of the floss.
To make a cup of tea, fill the bag hot water and let it brew for 3-5 minutes...and enjoy!!!
And these bags are hand-tied and sewn from silk, also an option .... :)))


